
AS FEATURED IN
If your bagpipes feel hard to play or seem to require way too much air, the issue might be how your drone reeds and chanter reed pressures are set up. In this video I’ll explain the crucial difference between the air pressure required by your chanter reed and your drone reeds, why it’s essential to match them correctly, and exactly how you can do it yourself at home.
Many pipers mistakenly believe their pipes are “too hard” when the real problem is their pipes are simply “taking too much air.” I’ll help you identify the real issue and show you how to fix it quickly and effectively.
Watch the video and scroll down to read the full video transcript.
The critical difference between “pipe hardness” (chanter reed air pressure) and “air usage” (drone reed airflow).
How to easily determine if your pipes are truly too hard or just taking too much air.
Step-by-step instructions to properly set drone reed pressure using the bridle.
How to find your optimal chanter reed pressure—avoiding choking and chirping.
Precisely matching drone reed and chanter reed pressures for optimal efficiency and comfort.
Common drone reed issues and how to easily troubleshoot and resolve them.
Video Transcript: I have a busy day, but I had a little bit of a gap here, and I thought I would just throw on a quick live video here. Thanks to everybody who’s been watching the channel. If you’ve been following BagpipeLessons.com here on YouTube, we’ve been doing tons of videos, and thank you for all the great feedback on these videos. It really means a lot when you like and add comments and subscribe and all that stuff. So it’s really cool. We’re going to keep doing it.
So today I just want to talk a little bit about setting up your drone reeds. I’ve got several similar questions emailed to me just in the last week, and it’s been something that a lot of people have been…
A lot of people have been asking about and talking about on different discussion groups and Facebook groups, and that is: how do you set up your drone reeds properly so that they’re taking the right amount of air—not too much and not too little?
Some people call it calibrating drone reeds. I just call it setting up your drone reeds.
So basically, there’s a couple of concepts that are really important to understand.
The big one is: how hard are your pipes?
Now, when we talk about how hard your pipes are, basically we mean what is the pressure level that’s required to make all of your reeds sound? And because the chanter reed takes more air pressure than the drone reeds, really we’re talking about the chanter reed specifically.
So when you talk about ‘how hard are your pipes,’ that is ‘what is the pressure required to get that chanter reed to kick in?’ That chanter reed requires more pressure than the drone reeds, typically. So that would be ‘how hard are my pipes?’
The other thing is: how much air are your bagpipes taking?
And how much air your pipes are taking is determined somewhat by the chanter reed, but also by the drone reeds and also by anywhere else that air could be leaking out of your pipes.
So it could be a leaky valve, it could be a leaky bag, it could be leaky hemp joints, but typically the place, if you don’t have any like, you know, malfunctions with leaking joints or bag or anything like that, the issues with your pipes taking too much air are going to be because your drone reeds aren’t set up properly.
So I want to talk about that.
So there’s really two things that make your pipes sort of like exhausting to play or hard to play.
One is that the chanter reed is too hard.
The other one—they’re taking too much air, probably from the drone reeds.
So I’ve got my two little whiteboards here…if we were to make a graph of how the chanter reed works, right…this is pressure, and this would be zero pressure.
So, as you increase the pressure, there’s no sound. When there’s zero pressure, there’s no sound, and as you increase the pressure, at a certain point, the chanter reed is going to start to make some sound, right?
So, we call that the choke line, because if you are playing your pipes and your pressure drops below that line, the chanter reed cuts out. We call that a choke.
If you increase the pressure, the chanter is sounding this whole time, and at a certain point, it’s going to be too much air pressure and you’re going to be overblowing the reed and what’s going to happen? Well, you’re going to be chirping and squeaking and squealing. So it’s called the chirp line.
So somewhere between overblowing the reed where it’s going crazy and sharp and squealing and chirping up here, and down here where it’s choking—you want to be blowing your pipes somewhere in that range.
Now, some pipers like to play just above the choke line. Some pipers like to sort of blow what I’d say in the middle of the reed or at the top of the reed.
A little bit of that is personal preference, but I would say everybody, even the best of the best, you have little bits of fluctuation in your pressure.
If you’re right at the choke line, if you have a little bit of a fluctuation below the choke line, you’re going to choke out, and that’s no good.
The other thing to think about is the quality of the sound of your chanter.
Sometimes if you’re at the choke line just above, your chanter reed is sounding, but it’s not really projecting nicely. It’s not a bright, crisp projecting sound. If you blow a little bit harder, you’ll find slightly harder pressure, but you get twice as much volume out of your chanter sound. So that’s probably what you want to—that’s probably where you want to go.
Depends somewhat on the reed—the type of reed that you play—but I think blowing somewhere well into the middle of the reed, you are going to get the most efficient sound production from that reed and the strength you’re putting into it.
Here’s another thing to think about: The high A is the most sensitive note to pressure, and often when you’re blowing just at the choke line, the high A will be crowy, which means it has a scratchy sound. And if you blow a little bit harder, that crow goes away.
Now, the best pipers—they love the high A note. They love the quality of the high A because the high A has this ability to have a really nice texture to it. It’s a little bit of texture, almost like a bacon sizzling sound or a little bit of twinkling sound.
And you listen to the great pipers who get a great sound—they have a great high A.
One that comes to mind would be Roddy MacLeod—amazing high A—but all the great pipers, when they’re really dialed in, they get a really nice high A. Not crowy, but not—if you blow up here—it goes really clear and it’s like clear and almost shrill sounding. So somewhere right in the middle, you’re going to find that quality of high A that you want.
Okay, so that is the chanter pressure. So you’re probably going to want to be somewhere right in here where you get that nice high A, you’re not in danger of choking, and you’re not in danger of chirping.
Now, when you have a harder or an easier reed—a harder reed just means that everything here is going to be shifted up. It’s going to require more air—higher air pressure to get past the choke line—but then it’s also going to require even higher air pressure to chirp.
So, often what will happen with a pipe chanter reed when you first get it—whatever strength it is—it will break in and will get a little bit easier over time, and that’s what we expect.
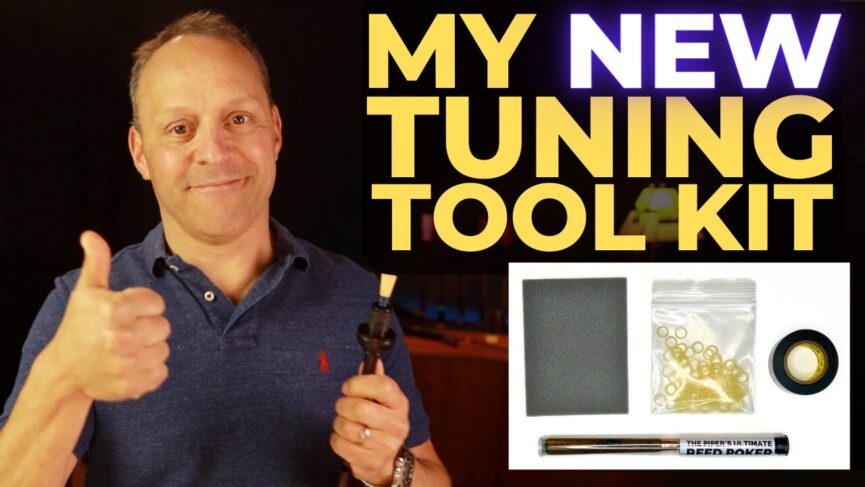
So what can you do to make that reed easier? You can put an elastic band on it. People also pinch their reeds. I don’t recommend that. I stopped pinching my reeds when I invented the Tone Protector. So no more pinching.
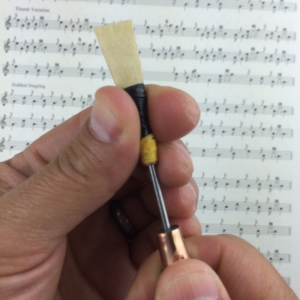
If your reed gets too easy, it means that the whole thing is dropped down. It’s really easy to get it to play, but it’s really easy to get it to chirp as well. So then you want to make your reed a little bit stronger—to raise the pressure for everything—and that’s what you use the Piper’s Ultimate Reed Poker for….and it kicks into that second tone.
Now, what if you increase the pressure even more? It’s going to shut off. So that’s what this is. It’s shut-off pressure. So down here is the pressure that you need to get the first tone out of the drones, and here is when, as you increase the pressure, when it kicks into that second tone.
Now, I have a whole long-form video on my YouTube channel all about setting up drone reeds. If your drone reed is not making those two tones, it’s not working right. That drone reed is not a good match for your drone, or there’s something wrong with that drone. Maybe it needs to be adjusted.
So, you can control the pressure up and down your drone reeds by adjusting the bridle. So the little rubber band bridle on there—if you move it very slightly towards the tip of the vibrating tongue, it closes the tongue down, and that does two things. It makes the drone reed take less air, so there’s actually less air escaping through the drone reeds. We love that. And it also lowers the pressure of everything. It means that the drone will get a first tone at a lower pressure. It will kick into the second tone at a lower pressure, and it will also shut off at a lower pressure.
So you can control the air usage—how much air the drone is using—and the pressure levels where everything happens by moving that bridle.
The screw at the end of your drone reed doesn’t affect the airflow. That’s simply for tuning. That changes the pitch of the reed.
So, now how do these things work together? So, we’ve got our chanter pressure over here. We’ve got our drone pressure over here, and this is how it has to work. The pressure that you are playing your pipes—
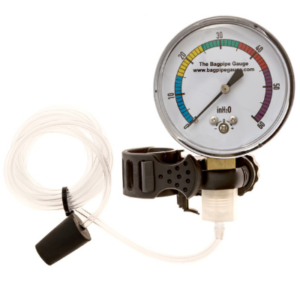
you can measure that with the Bagpipe Gauge—but the pressure that you’re blowing your pipes, that’s determined by where the chanter reed sounds, where you want it to sound. That’s the pressure. At that pressure, your drone reeds have to have kicked into that second tone, right?
So if we line them up like this, so that when you play that chanter and that chanter reed kicks in, you are into the second tone, right?
So, if you get a new chanter reed, it’s really hard—it’s up here—you have to blow so much harder to get it to kick in, but now your drone reeds are shutting off. So then you might think, “Well, I need to open up my drone reeds.” And when you open up your drone reeds by sliding the bridle back to open up the tongue, it raises the pressure for these, and now you’re well into the second tone. Does that make sense?
Or say your reed got really easy. Super easy. Now, when your chanter reed kicks in, your drones haven’t even kicked into the second tone, so that’s a problem.
So, the pipe chanter reed determines the strength of your pipes—how hard do you need to blow your pipes. And then you want to adjust the bridles on your drone reeds so that when that chanter reed kicks in, they are kicked into the second tone.
They’re not shutting off. If they’re shutting off, it means you have to open them up so they don’t shut off. If they’re not kicking into the second tone, you need to close them down.
I want my drone reeds to take the least amount of air possible. So what I do—I adjust them, I close them down so they’re taking less and less and less and less pressure, and at some point they shut off. And then I’m going to open them up very slightly.
I want to make sure that at whatever pressure I’m blowing my chanter—first of all, I want that to be comfortable for me, which is around 30 on the Bagpipe Gauge. If you’re at 35, your pipes are too hard. So right around 30 on the Bagpipe Gauge.
And then I want my drone reeds to not shut off at 30, but I want to make sure that they’re—if I went to 35, they would shut off. So I close my drone reeds down until when I’m playing my chanter, my comfortable chanter reed, that they shut off. And then I open them up very slightly. Does that make sense?
So that’s the only thing that you have to do to so-called calibrate your drone. I don’t like that word, but essentially that’s what you’re doing. People use that to describe other scenarios, which I don’t agree with.
Here’s the idea. You want a comfortable chanter reed, right around 30. It has a bright projection where you’re blowing in the middle of the reed—not overblowing it so it chirps, not underblowing it so you have a crowy high A or it’s on the choke line—so you’re in the middle of the reed. It’s got a nice bright projection.
And then you want your drone reeds closed down as much as possible, but not shutting off. So why do we want to close them down? So they’re taking less air. So there’s less air escaping from your pipes.
When I try bagpipes for a student—I’m teaching in a workshop and I want to help troubleshoot their pipes—I’ll blow their pipes up, and often right in the first second of blowing up, when I inflate the bag and strike it in, I can tell there’s too much air escaping from these pipes.
Could be the bag leaking, could be a leaky valve, could be a leaky joint—but usually the drone reeds are too open. They’re taking too much air.
If you want to start in the most likely place, it’s the bass drone. Check that bass drone. Shut it down. Close it down. Keep closing it down until it finally shuts off when you’re playing, and then open it up a little bit.
The other thing to keep in mind is that drone reeds don’t last forever. And often a really good set of synthetic drone reeds will be great for a long, long time—I’m talking years—and then weird things start to happen. They start shutting off randomly when you’re not overblowing, or they start to go out of tune, or they just are unstable to pressure fluctuations, and that is a sign that you need new drone reeds.
So, I’ll put a link in the description below for my drone reed guide and also a link to the full drone reed video. But you can find that by looking on the BagpipeLessons.com YouTube channel. I got tons of videos on there.
I’ve got to wrap it up. It’s been great to catch up with you live.
Thanks to everybody who’s watching here—Duke, Allen, Diphinus, and Tom. Any other comments on there?
Anyway, if you’re watching the replay, put a comment in there, say where you’re from.
Thanks for watching. We’ll see you next time, everybody. Bye.